Just leaving this here.
13 November 2017
8 November 2017
Polar Bears
This week is polar bear week. It coincides with their migration to Churchill, Manitoba, where they wait for Hudson Bay to freeze over, so they can return to hunting seals. I absolutely love polar bears, and seeing them in their natural environment is on my bucket list.
I made this brooch right back when I started my business. It’s still a favourite. I wanted to share the awesome work of some very talented makers who also use polar bears in their work.
First up it's Helen Noakes. You can find her work here. She works in silver and resin. Some of her resin even glows in the dark, echoing the beautiful and ethereal Northern lights.
Next up is the work of Eileen Gatt. You can find her work here. Eileen carves her pieces in wax and them casts them in silver. I have one of her stunning polar bear necklaces.
Dinny Pocock is a fibre artist, and you can find her stunning work here. Most of it whizzes off to galleries, but you can contact here if you are interested in something. One of her polar bears is on my 'one day' wish list.
Charlotte x
5 November 2017
Teeny diamond rings
I've really been enjoying making these recently. The photo doesn't do justice to the sparkle of these small but mighty, flashy 'brilliant cut' and conflict free diamonds. Earlier this year I did a mount making and stone setting course at the Goldsmith's Centre, taught by Sonia Cheadle, and I am so pleased that setting these is now second nature.
25 May 2017
Oreo cheesecake recipe
End of exams = time for a celebratory cake in our house, and my youngest asked me to make my no bake Oreo cheesecake for him. Having posted this picture on my social media this evening, I have had lots of requests for the recipe, so here it is...
Base
22 Oreos
100g melted butter
1tbsp caster sugar
Filling
450g full fat cream cheese
475ml double cream
35gm icing sugar
200g caster sugar
12 chopped oreos
Method
Whizz the 22 Oreos for the base in a food processor until they are fine crumbs
Stir in the melted butter
Press into a lined spring-form (or you won't get it out) baking tin
Refrigerate the base for 30 mins
Roughly chop the 12 Oreos used in the filling with a knife
Gently beat the cream cheese and add in the icing sugar and caster sugar
Whip the double cream
Fold the whipped cream into the cream cheese and fold in the chopped Oreos
Refrigerate for 4 hours or until firm
Before serving decorate with whole and broken Oreos and Oreo crumbs.
*I used a 20cm spring-form baking tin
**I can't even begin to imagine how many calories per slice
***My custom gold topper was made for me by Betsy Benn
13 April 2017
9 April 2017
Family necklaces
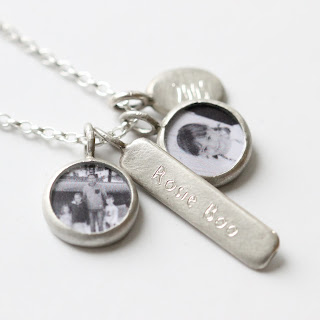
I love making these little family heirloom pieces and haven't posted any on here for a while...
set with an opal birthstone
Set with a tiny sapphire
8 April 2017
My home renovations
It's just coming up to two years since I moved to King's River Cottage. Although there's still more to do here, it has changed a lot in that time. For all those who comment on IG how calm my house looks, I thought it might be nice to show you some of the transformation pics.
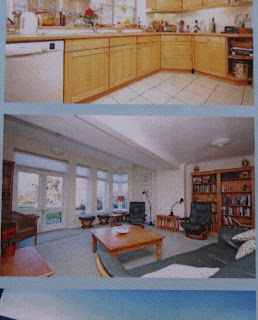
Estate agent sales brochure pics
When I bought this house it had a pine kitchen at the front of the house over looking the road (more of that to follow in another post). The back of the house was a big L shaped living room with a dining room at one end, and the sofa area at the other. It's walls were beige and it was carpeted in green.
This is the L shaped living area, looking in from the back of the house. By now I have already slapped white paint on the walls.
Looking from the dining end of the living space out towards the garden. It looks extra dark as the pic is taken towards the light, but this part of the room is always rather dull.
Before and after. Left: looking into L shaped living area. You can see a narrow hallway and a huge utility room (plus the very huge job-lot of solid wooden floor that I bought in the sale). Right: after knocking down the corridor and downsizing the utility room. Now you can see all the way to the garden.
My old house used to have a huge live in kitchen, and this worked really well for family life. I could cook supper while supervising homework. When I first saw this house, I knew it had potential to do something similar. This time I was doing the work myself (with help) and a very limited budget.
With the help of my friend's husband and my dad, the original doorway was bricked up, the three of us put a steel in, and then we demolished the big wall under it. (Here you can see the newly created stud wall of the smaller utility room). The day we knocked it down, not only had I done all the sledgehammer work, but the old utility room was full up with a mountain of bricks. The kids were due home from school just after 4 and I knew I had to move every single brick to restore a bit of normality before they got in. That was a very tough day - made slightly worse by the fact I hadn't thought about the time needed for a skip licence so I had to move them once to the front garden, and again a few days later into the skip.
Starting to take shape. The floor was laid by me, plank by plank, and you can see some of the new kitchen stacked in place. When the kitchen was delivered, the lorry driver refused to come down our narrow road, so somehow I managed to single handedly get the entire kitchen down the road and into the house.
There was a little delay while we broke through this bit of wall.
The first Christmas here, we had this interesting feature holding up the ceiling.
As you can imagine, there were times when I wondered if all this work, and all this disruption was worth it just to add a metre or so to a room.
Slowly the kitchen was taking shape, and yes, it was all worth it for that extra metre. This photo makes me laugh as you can see where I had done the floor as much as I could (I was still waiting for that other small bit of wall to be down) and I had painted - but not a bit where the plaster hadn't dried. I obviously couldn't wait!
I think this is the day the work surface went in, as I still don't have a tap or cooker. The kitchen was a cheap-as-chips on line purchase, with a lovely white quartz composite worktop to make something very cheap look more expensive. All the appliances were sourced on-line as cheap as I could find them, and I re-cycled the cooker that was here when I moved rather than buy a new one. The table was is 16 years old from Habitat and the chairs sadly are not originals.
One of the things I promised myself when I moved here was a wood burner. This sits down at the living area of the room. I wanted to have an exposed flue like this to maximise the heat radiating into the room.
Frustratingly, I haven't got the photographic skills to catch the whole room well for you. But those two give you a feeling of how it looks now. I'm still short of the odd bit of skirting board and cornice in here, but I know I will get to them one day.
I'll show you what I did to the old kitchen in another post.
Subscribe to:
Posts (Atom)


